Yellow is the perfect color to welcome the Spring!
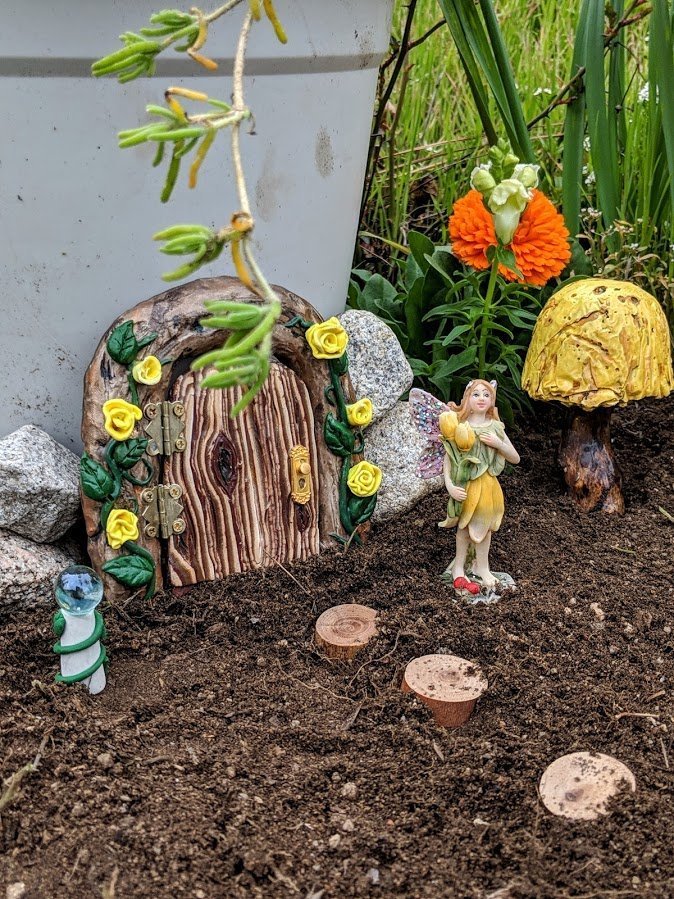
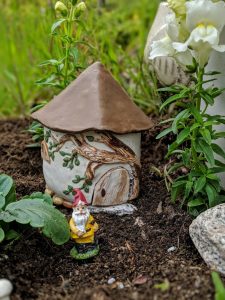
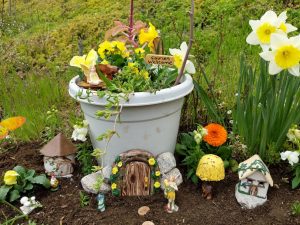
A few days of warm weather can often bring bulbs up to flower. Yellow is a sure sign that spring is around the corner! That’s why I thought it might be fun to create a Yellow Spring Fairy Garden! I included Daffodils in this display, and they are a very tall flower. Therefore I also included a tall Fairy house and a pot. By filling the pot with extra flowers and miniatures, the display can have lots
the purchased plants
of depth and variation, even though I’m sticking with a single color.
White: white is a neutral color that you can add to almost any display. It’s an excellent companion with yellow because it can carry
The basic structure- weeds clear!
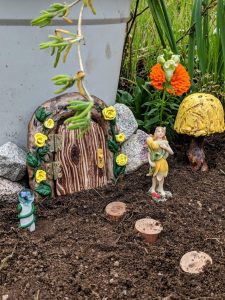
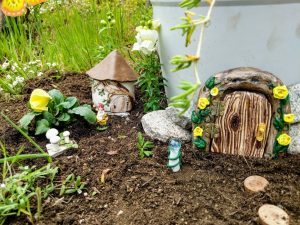
the extremes of very pale yellow all the way through to orange colors. By using a color palette that includes white, you can use yellow all the way from a pale butter, all the way through to Orange. Green is always going to be your backdrop in a Fairy garden display that includes live plants, so be sure that you use different shades of green as well. This will help to blend all the shades of yellow together.
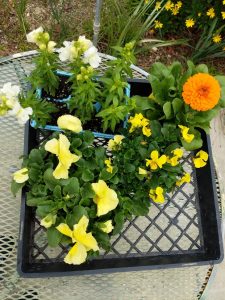
For the display in this post, I purchased Calendula, Pansies, Viola, and Snapdragons. The Daffodils, Succulent, Allysum and budding Rosebush were already there.
The nursery has so many choices! I could have really gone wild with the plants for this Garden! But, I wanted to keep it simple. So, I chose plants that were common across the United States.
adding the colorful annual plants
This entire display is outside in both the ground and in a pot. Dimensions : 3 feet
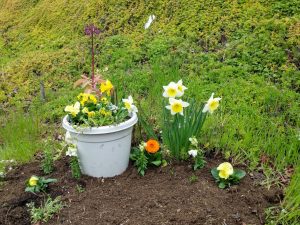
adding color to this pot
wide, 3 feet long, and about 2 feet high.
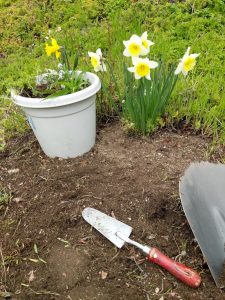
Since I had already chosen the Daffodils to be my floral focal point, I cleared the area of weeds around the daffodils. Next, I decided to use the Daffodils as the tallest point of reference. Therefore, I added the pot alongside the Daffodils to gradually train the eye downward.
After choosing the plants at the nursery, I continued this triangular shape by adding
the plants with taller ones in the center, and shorter ones on the sides. Eventually, I did add a flowering Succulent behind the Daffodils that the height was even taller. Finally, I brought in some butterfly stakes to add some color, and fill in this height differentiation.
The video will take you to my Facebook page. Please do follow me over there, as I have many photos, products, and works-in-progress that may inspire you!
Below you will find links to the products that I used in this display. Feel free to browse to the shop and see if there’s something you like!
As you can see the products in the Discover Your Dreams Collection are presently only in my Etsy shop. They are available to the international market. I will ( hopefully) figure out how that shipping process goes and then they will also be available here on the site soon too 🙂